By Jeff Russell
Marmoset Toolbag has Python scripting support! This feature allows for the creation and distribution of user scripts and plugins to add custom behavior to Toolbag. Python is a powerful language, and its inclusion into Toolbag greatly enhances the possibilities of the software.
This page serves as a basic introduction to developing with Python with Toolbag. If you’re a software developer or a technical artist, you’ll probably be up and running quickly. If you’re new to programming, you might need to spend some time with the Python language and tools first before you’re able to make much headway.
The Python Language
Python is a powerful, simple, and widely-used language, well suited for scripting and plugin development. It is beyond the scope of this article to teach the Python language itself, but if you are unfamiliar you can fairly quickly get your bearings in the official Python tutorial.
As of the version 4.03 release Toolbag uses Python 3.9.4. You may find other reference material elsewhere on the internet for earlier versions of Python. Most concepts from version to version remain the same, but there are some differences so you should be careful when checking reference material.
Hello World
Example scripts are a great way to get started and Toolbag ships with a collection of them accessible through the Edit -> Plugins menu.
Let’s create and run a simple example script of our own. Open your user plugins folder through the menu option Edit -> Plugins -> Show User Plugin Folder. Create a file named “tutorial.py” in this folder with a text editor of your choice. Place the following line of code in it:
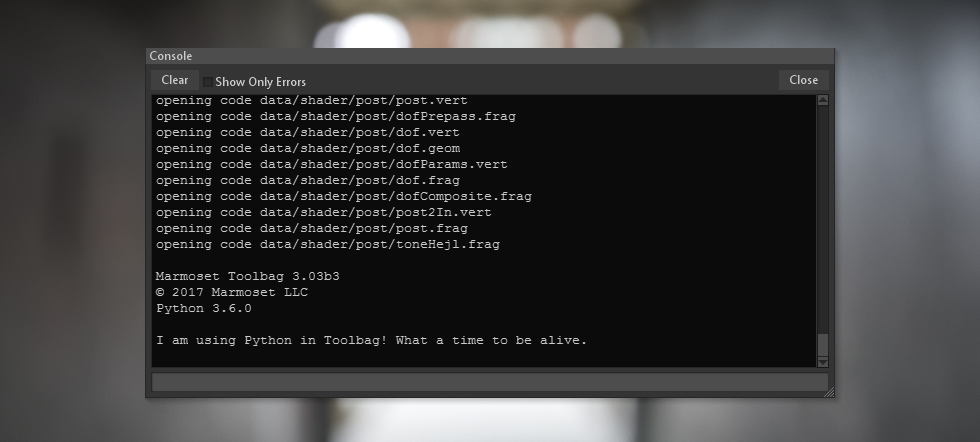
The ‘mset’ Module
The real business of writing plugins for Toolbag resides in the mset module, a set of built-in functions and classes that gives you access to Toolbag’s main features. Toolbag’s full Python API Reference manual is available online, or accessible from your local install of Toolbag (select “Python API Reference” from the “Help” menu).
As of Toolbag 4.03 we’ve improved our auto-complete bindings with the addition of type hints across the entire API, taking the guess work out of writing scripts and plugins. Our engineer Alain Galvan (@Alainxyz) wrote a blog post that shows how to configure your Python environment to write plugins quickly with auto-complete and our bindings.
In order to use the mset module in your code, you will need to first import it as you would any other, with the import directive. Here is a simple program that imports the mset module and prints the names of all objects in the current scene:
As you can see, the relevant call here is to the mset function getAllObjects, which returns a list of every object in the scene. Toolbag objects correspond to visible icons & names in the Toolbag outliner on the lefthand side of the UI. Essentially, an “Object” in the Toolbag sense refers to an editable entity that the user can see and control through the graphical interface. There are many different types of objects in Toolbag: Cameras, Skies, Meshes, Lights, and more.
In Python terms, every Toolbag object is a subclass of the SceneObject class. This base class provides some common methods and fields for naming, child objects, visibility, and more that every object will have.
Here is a slightly more advanced example that searches for a specific object by name and alters some of its settings, in this case some post effect settings for the main camera:
Most object types in Toolbag have settings that can be manipulated in a similar fashion. The mset module also has functions for creating and destroying objects, importing and creating meshes and materials, as well as loading and saving scenes, taking screenshots and video, and more. We’ve made an effort to expose just about everything Toolbag does through the Python interface, and we hope you find it to be as powerful a tool as we have.
Explore Toolbag’s complete Python API Reference
User Interface
The mset module also provides a simple set of classes for creating your own user interface. There are classes for windows, buttons, sliders, checkboxes, text fields, and more. Here is a quick example script that creates a window with one button:
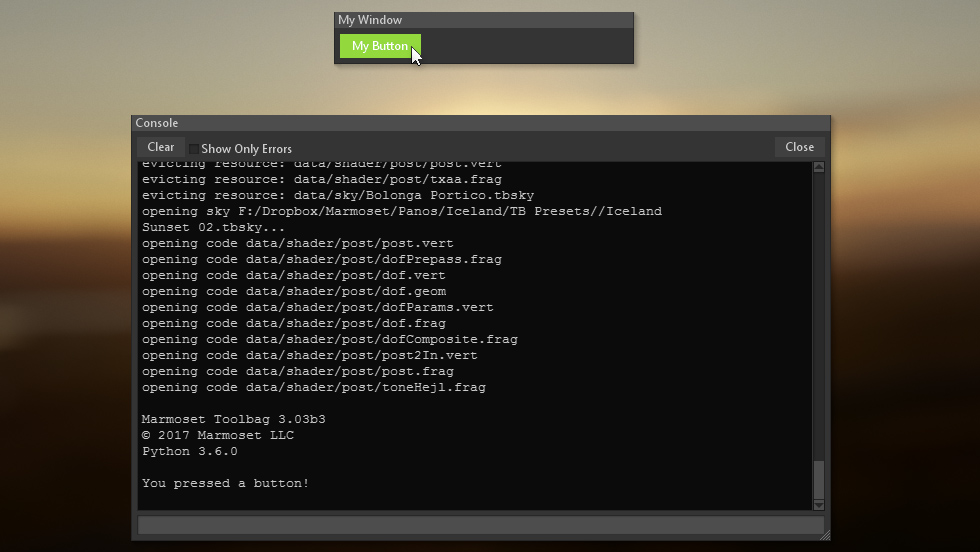
This demonstrates a few important things. First and foremost, we see how straightforward it is to create UI elements and add them to a window of our own making. Second, if you run this script you will notice that it does not terminate right away. The UI stays up indefinitely until the user presses the button. Plugins that have active UI will remain “running” until a call to exit is made (or all UI is closed). Accordingly, note that the button onClick member has been hooked to the ‘doSomething’ function above, which contains a call to mset.shutdownPlugin.
This call, as you may have guessed, shuts down the currently running plugin and closes any user interface.
File Locations
Plugins reside in one of two locations, either of the “User” or “Default” directories. The user directory is in an OS-specific location with full permissions for your user login, and may be accessed through the menu option Edit -> Plugins -> Show User Plugin Folder. This is a good place to continue to put your own plugins, as it will always have permissions on your machine and will survive any removal or reinstallation of Toolbag.
The “Default” plugin directory contains a short list of example plugins we have provided, in a location tied to the Toolbag installation. This is a good place to install plugins for all users on your machine if you are a system administrator.
Once you’ve added a script in one of the plugin directories, you may reboot Toolbag or refresh the plugin menu to add it to the plugin list. Once you see your script in the list, you may run it by selecting it from the menu.
Scripts may be structured as either a single .py file, or a named folder containing multiple .py files and subfolders. Plugins organized in folders in this way should contain one file named __main__.py, which will serve as the main entry point for the code. This file can import and reference other files in its directory as needed.
Launching Toolbag
Toolbag may run a python script anywhere on your machine at launch time, if the path to the script file is passed as a boot argument. In this way Toolbag can run as a configurable tool for use in automated systems or other scripting tasks. In windows this looks something like:
And on macOS:
Python scripts may also be passed arguments. Toolbag will forward any arguments after the script path to your script in sys.argv:
As of Toolbag 4.04, you may also append custom paths to sys.path. This can be useful in cases where your script needs to include other python modules in other locations on your machine:
More Examples
More advanced examples are included with your local install of Toolbag in the Default plugin directory (Edit -> Plugins), and we encourage you to give them a look over once you feel comfortable with the basics.
These plugins demonstrate some more advanced concepts such as mesh creation, texture projects, baking, material importing, and screenshot automation.

Toolbag Scripting is Growing
We would love to hear how well the Toolbag scripting tools are working for you. We are looking to expand and improve the Toolbag Python API in the near future, and your suggestions would be valuable. If you find something you think is missing or have an idea for something useful, please let us know!
We can be reached at support@marmoset.co any time for any queries or suggestions.

